QNAP supports containers using its own Container Station, which is great to get some containers up and running fairly quick, but …
That is why some people, like me, want to use another Docker GUI for managing the containers, one is Portainer. Using the Container Station, Portainer is quite simple to be installed, but I struggled getting Portainer talking to QNAPs docker implementation. After I have figured it out, it was straight forward, but for everyone else struggling - let me help out.
Create Portainer Container
I assume that QNAPs Container Station is already installed and running, otherwise activate it in the App Store.
- Hit the Create button on the left menu and search for portainer.
- Hit Create once again on the portainer/portainer image found.
- Using the Advanced Settings define a shared folder. Mount a volume from host and define the mount point /data for it. This makes your configurations persistent.
- Also adjust the network settings. If you keep them default, portainer is available via http://NASIP:9000
Prepare Container Station as Portainer Endpoint
Portainer needs to talk to the Container Station docker implementation, this is done using TLS via specific port on your NAS IP. We need to make some adjustments in the background to make this work and export the certificates.
- In the Container Station open Preferences > Docker Certificate
- Download the certificate to your PC by clicking the Download button
- Use an appropriate tool to unzip it.
- Upload the files to your NAS. Use the File Station or any available share
- Login to the NAS via SSH using the admin user
- Create the directory by execute
mkdir -pv ~/.docker - Copy the files from the share/folder to this directory
cp /yourfolderwithfiles/ ~/.docker/ - After this execute
export DOCKER_HOST=tcp://192.168.1.10:2376 DOCKER_TLS_VERIFY=1
This is also described on the Docker Certificate site, slightly different but you should get the idea and the process.
Add the Container Station as an endpoint to Portainer
Adding the Container Station as an endpoint took some time to figure out, but it is easier then I thought at the end. First time logging in to Portainer you need to create an admin user. After that Portainer needs an endpoint to connect to.
- Choose Docker environment or Remote Docker
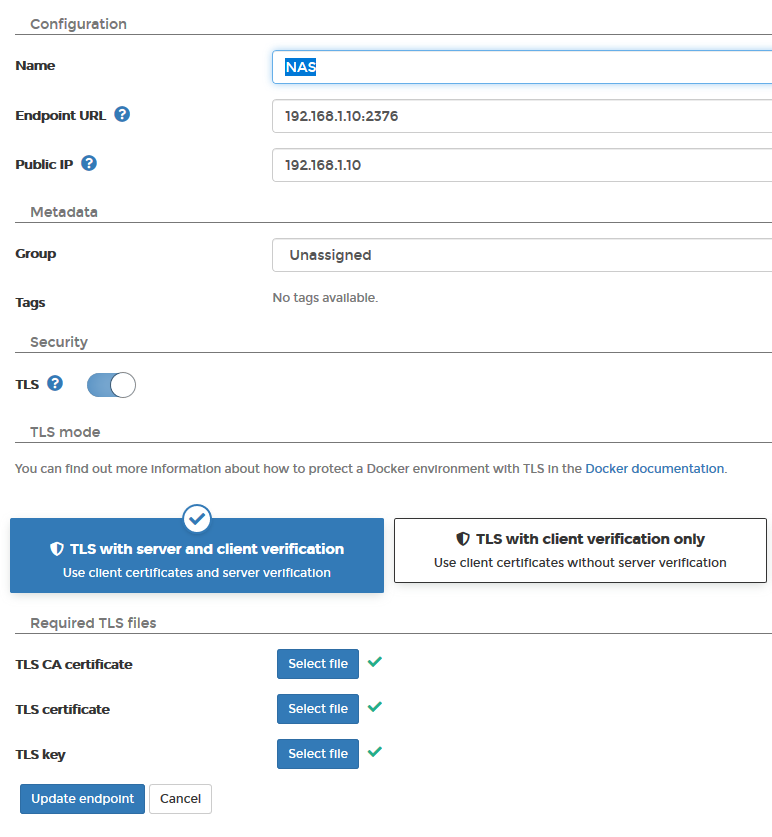
- Define a name
- The endpoint URL is the one from the EXPORT command, like
192.168.1.10:2376with the port included - Keep the public IP empty
- Turn on TLS and choose TLS with server and client certificate
- Now we need the certificates stored on the computer to be uploaded. Choose the files as stated below
- TLS CA certificate == ca.pem
- TLS certificate == cert.pem
- TLS key == key.pem
- Click Add endpoint
Happy Portainer!